photo NavFB_zpsjwdb3bt3.png photo NavIG_zpskqcprcil.png photo NavTwit_zpsyhgy6hy6.png photo NavPin_zpskrv3u3lk.png photo NavBL_zps30om3pbh.png


Showing posts with label Tiny Prints. Show all posts

12.24.2014

Merry Christmas - 2014

I know it's been a bit quiet around these parts lately, but I wanted to take a moment and wish all of you a Merry Christmas! I hope you're all able to spend a few days with your family & loved ones to celebrate the holiday season. 

We'll be spending Christmas up in the foothills with my family, then driving down to San Diego to celebrate with Andrew's family. Although there will be a lot of driving, I'm so looking forward to all the time with family & taking a little break from work. 

Here's a peak at our 2014 Christmas card. What a wonderful year it has been! I always like to include a letter with our card to share the highlights of our year with friends & family.


It's hard to believe I'm sitting down to write our Christmas letter again. It's no wonder the year has flown by, 2014 has been full of adventure and fun. Andrew and I are always on the go, and we wouldn't have it any other way.

Some of the highlights of the year were trips down to San Diego to see Andrew's family, a Bachelorette party in Palm Springs, camping in Tuolumne Meadows with Theresa's family, the Giants winning the World Series, a trip Mexico for a friend's wedding, and Portland for Thanksgiving.

Theresa is still working for the same small, family owned consulting firm in San Francisco. In addition to her full time position, Theresa also started styling part time for an exciting company called Stitch Fix. It's a personal shopping service based out of San Francisco that is growing rapidly. Theresa loves being an Auntie, and is excited for her newest niece or nephew arriving in March. She tries to spend as much time as possible with Phillip and her family, but it never seems like enough. And although less frequently, she is still blogging at From Foothills to Fog. If only there was more time in the day!

Andrew is also doing well. He's looking forward to the start of snowboarding season, hopefully it will be a big snow year! He is always on the go, the more activities the better! During the week he keeps busy at the gym and playing on two softball teams, which he really enjoys. In July he started a new job at Lending Club. It's an exciting company to be a part of, they just went public! In the new year he hopes to fit in as many weekends for camping, snowboarding, and surfing as possible. 

As wonderful as 2014 has been, we're really looking forward to the new year. It's the last year of our 20's and we hope to make it the best yet and begin our 30's as our best selves. We love living in such a fun city, it's perfect for this stage of our lives. Wishing you and your loved ones a Merry Christmas and Happy New Year!

With Love,
Andrew & Theresa (and Louis)


Happy Holidays! Thank you for reading & supporting this little blog of mine!


We love Tiny Prints & have ordered our cards there the past two years. 
Here's our card from 2013!

12.19.2013

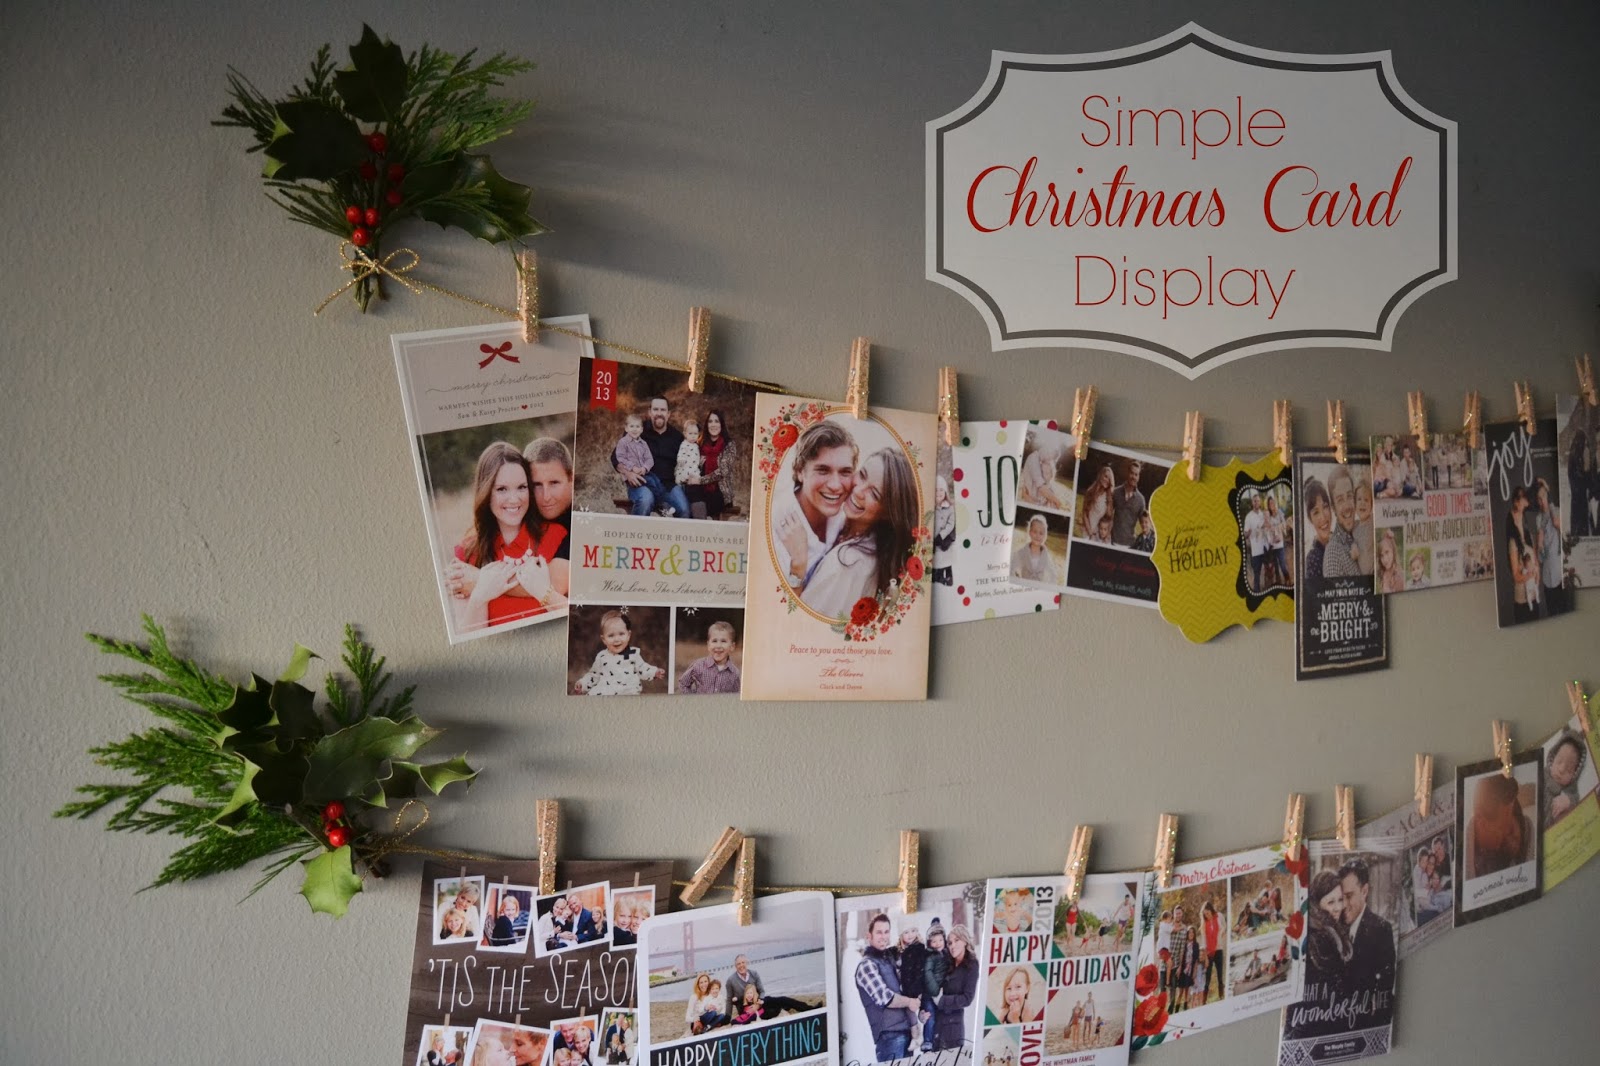
Simple Holiday Card Display


One of my favorite things about the holidays is receiving holiday cards from my closest friends and family members. I seeing the photos and reading about the events and milestones people have had during the year. I think it's such a wonderful tradition.

Growing up, creating the Christmas card for our family was always a big event.  At some point, we started creating a picture collage (we did pictures before it was a thing)! We'd all look through the pictures from the year, and help choose which ones should be included in our card. Making sure everyone one had the same number of pictures on the card, of course :)

In addition to photos, I also really enjoy reading about our loved ones, and any exciting news or milestones they've had that year. For our family Christmas card, my Dad writes a newsletter to accompany our picture collage. He writes about our family; vacations we've taken, and significant memories from that year. I love looking back on them years later. It's like a little window back in time, and I'm so thankful that our family has them.

When I still lived at home, I remember how much I loved reading the holiday cards, and looking at photos as they arrived in the mail. We kept them out throughout the holiday season, and I would often pick them up to re-read, and stop to look at pictures as I walked by. Now that many of my friends are married and starting families of their own, it has been so wonderful to receive Christmas Cards from them at my own home.

I wanted a fun way to display our cards so that we could appreciate them throughout the season. When I was working with Tiny Prints for this post, I came across this holiday card that I loved. The card reminded me of a way my friend had displayed her cards a few years ago, and I wanted to recreate my own version of that in our home. It's the perfect, simple holiday card display that will only take a few minutes to put together. Leaving you more time to read all those cards from loved ones, and get your own holiday cards in the mail!

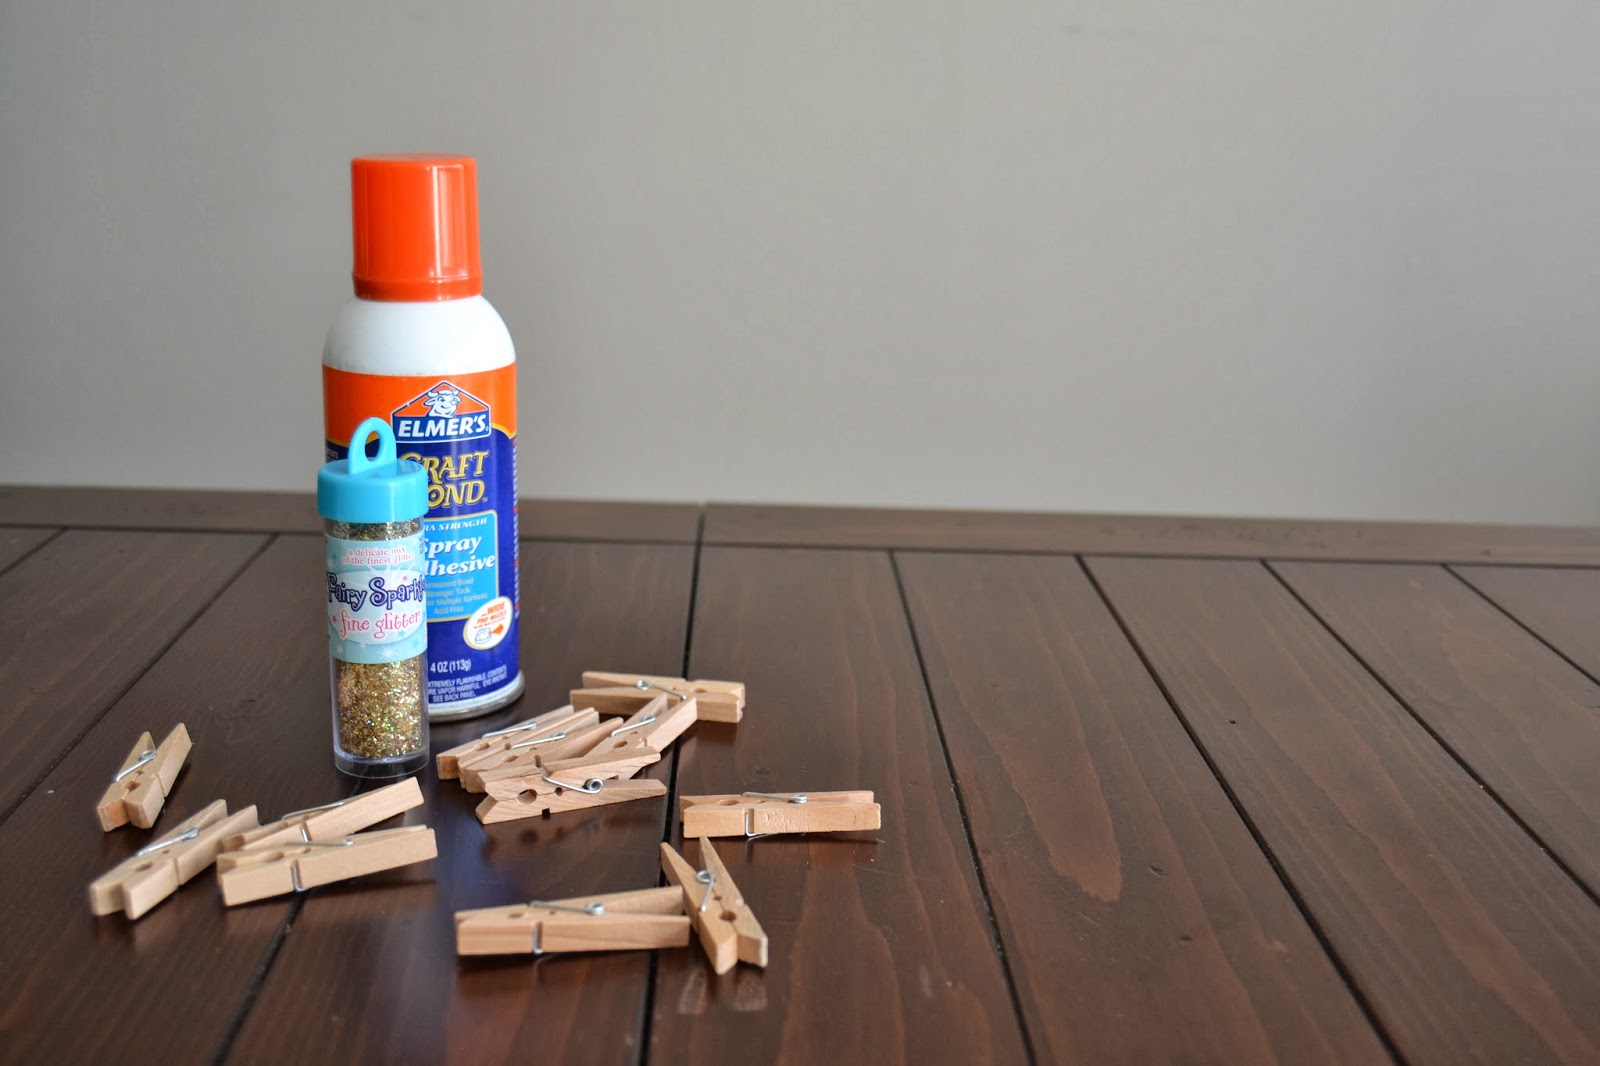
You'll only need a few supplies: I used mini clothes pins, spray adhesive, gold glitter, string, greenery and holly left over from wreath making, wire, nails, and of course your holiday cards!


Once you've selected the wall you'd like to display your cards on, put in a couple nails at your preferred height and distance apart (this will depend on the wall you display them on). I wanted two rows, so I started a little higher than if I was only doing one. Next, you'll tie the string to each nail, creating a line to attach your cards to later. Even though you'll want the line to droop a little once you're cards are displayed, secure it tightly for now. The weight of the cards will create the drooping affect once you attach them.


Now, much like I did when making a wreath, I gathered a small bunch of greenery and piece of holly. I used wire, twisting tightly at the back to secure. Using the excess wire, twist around the nail to add a decorative touch at the ends of your line. I also added a bow using my gold string to cover the floral wire, bows make everything cuter! Next, repeat these steps to add another row to your display.


Now, you'll need to get your mini clothes pins ready. I had some spray glue and glitter lying around, and thought it would make this project a little more festive for the holidays. I went into the garage and laid down an old towel. Then I simply sprayed a generous amount of glue on my clothes pins, and poured the glitter over top. I let them dry for about an hour while I added the 2nd row to my display, then went down and shook off the excess glitter.


Finally, the fun part, displaying your cards! Now that you have sparkly and festive clothes pins, you can display Christmas cards as they arrive in the mail!


I've been having so much fun displaying cards as they come in! I love seeing the photos of my friends and their growing families. This year, Andrew and I decided to do our first Holiday card together. I'm so excited to start this tradition with him. We spent forever looking at all the cute options Tiny Prints offers, I can't wait to share the one we picked with you. Don't they have so many cute Holiday Cards? It took forever to narrow it down to the one, I wanted like five!

Have you come up with a creative way to display your holiday cards? If so, I'd love to see it!


12.13.2013

DIY Keepsake Christmas Ornament


I love giving gifts just as much as I like receiving them. As you might have noticed, one of my favorite aspects of gift giving, is finding ways to personalize them, and make it meaningful for the recipient. 

Last month, I received an email from Tiny Prints that reminded me of this project. I wanted to share these keepsake ornaments with you, since it's such a simple and thoughtful gift.

I am a sucker for anything sentimental. I find a reason to keep everything, and love looking back on keepsakes to remember specific times and places throughout my life. One of my favorite Holiday traditions is decorating the Christmas tree. Every year, I put on my favorite movie, White Christmas, and decorate the tree. In years past, I've especially loved decorating with my parents. As we pull out each ornament that has been carefully packed away, we stop to remember who bought it, or during which vacation it had been purchased. My parents have a particular set of wooden ornaments that were hand painted during their first years of marriage. Because they were newly married, and only had a handful of ornaments,  they had family members paint ornaments at Thanksgiving. I love listening to my parents as we trim the tree, "Did Jay paint this one? Or was it this one?" It's part of what makes the tradition so special. Ornaments are like a road map to your life, representing the various stages, people, and places.  

This was one of my very first pins on Pinterest a few years ago. With my love of Christmas and everything sentimental, it was the perfect project. I've since made many of these for friends and family, and they're always a big hit!  What I love about these keepsake ornaments is that they're so personal. It's a reminder of one of the most special times in someone's life. And will be a treasure to have, and hang on the tree for years to come. 

I've made many of these using wedding invitations to include with my gifts when friends get married. Or use a birth announcement for an updated version of a "Baby's First Christmas" ornament. You can personalize them in so many ways. Since my sister was married in Maui, I hung a little starfish charm on her wedding ornament with the ribbon. For a birth announcement, you could add an initial charm for the baby's name. And using fun ribbon adds texture and color.

These really could not be more simple to make, and only require a few supplies...


One of my closest friends, and college roommate, is expecting her first baby in February! I couldn't be more excited for her, and I thought I'd make her a keepsake ornament using the baby shower invitation and create a tutorial for all of you. Don't you love her invitation? Tiny prints has so many cute options! 


First, gather your supplies. You'll need the invitation, announcement, or whatever you'd like to use as filler. In addition to that, you'll need a clear glass ornament, ribbon, scissors, and a round tool such as a pen (I've even used a screw driver before). I happened to have this little tool lying around which worked great this time.


First, cut your invitation into skinny strips. I like to leave things like names or dates that are meaningful, so they show through on the finished product.


Once you cut your strips, it's time to start curling. Tightly wrap the strip around your tool, creating a ringlet. Hold it in place for a few seconds to set the curl, then set it aside. 


Once all your strips are curled, you can stuff them inside the ornament. There is really no wrong way to do this, but if there is a word or date I want to show, I use my tool to help adjust the curls into place.


Once you've filled the ornament, place the top back on. Using the ribbon of your choice, create a loop to hang the ornament from. I also like to add a little decorative ribbon. I chose a light blue velvet ribbon since my friend is having a boy, and it looked nice with the colors of the invitation. 


It's such a simple ornament, but so meaningful. I'm sure anyone would love to receive it! My sister says it's always one of her favorite ornaments to put on the tree, and reminds her of her wedding in Maui. This year, she has a new one to add to her tree, a keepsake for Phillip's first Christmas. Two ornaments that represent the two of the most joyous days of her life.


I hope you'll keep this little Christmas DIY in mind, I promise anyone would love to receive it. Or make one for yourself!


Thank you, to Tiny Prints for inspiring this post!

09 10